Generating Keys
Now that you have created the service accounts, it is time to generate the keys needed to use TitanQ API. For each of the previously created service account, we will need to generate a JSON key which will be used to query the TitanQ API.
Read Key
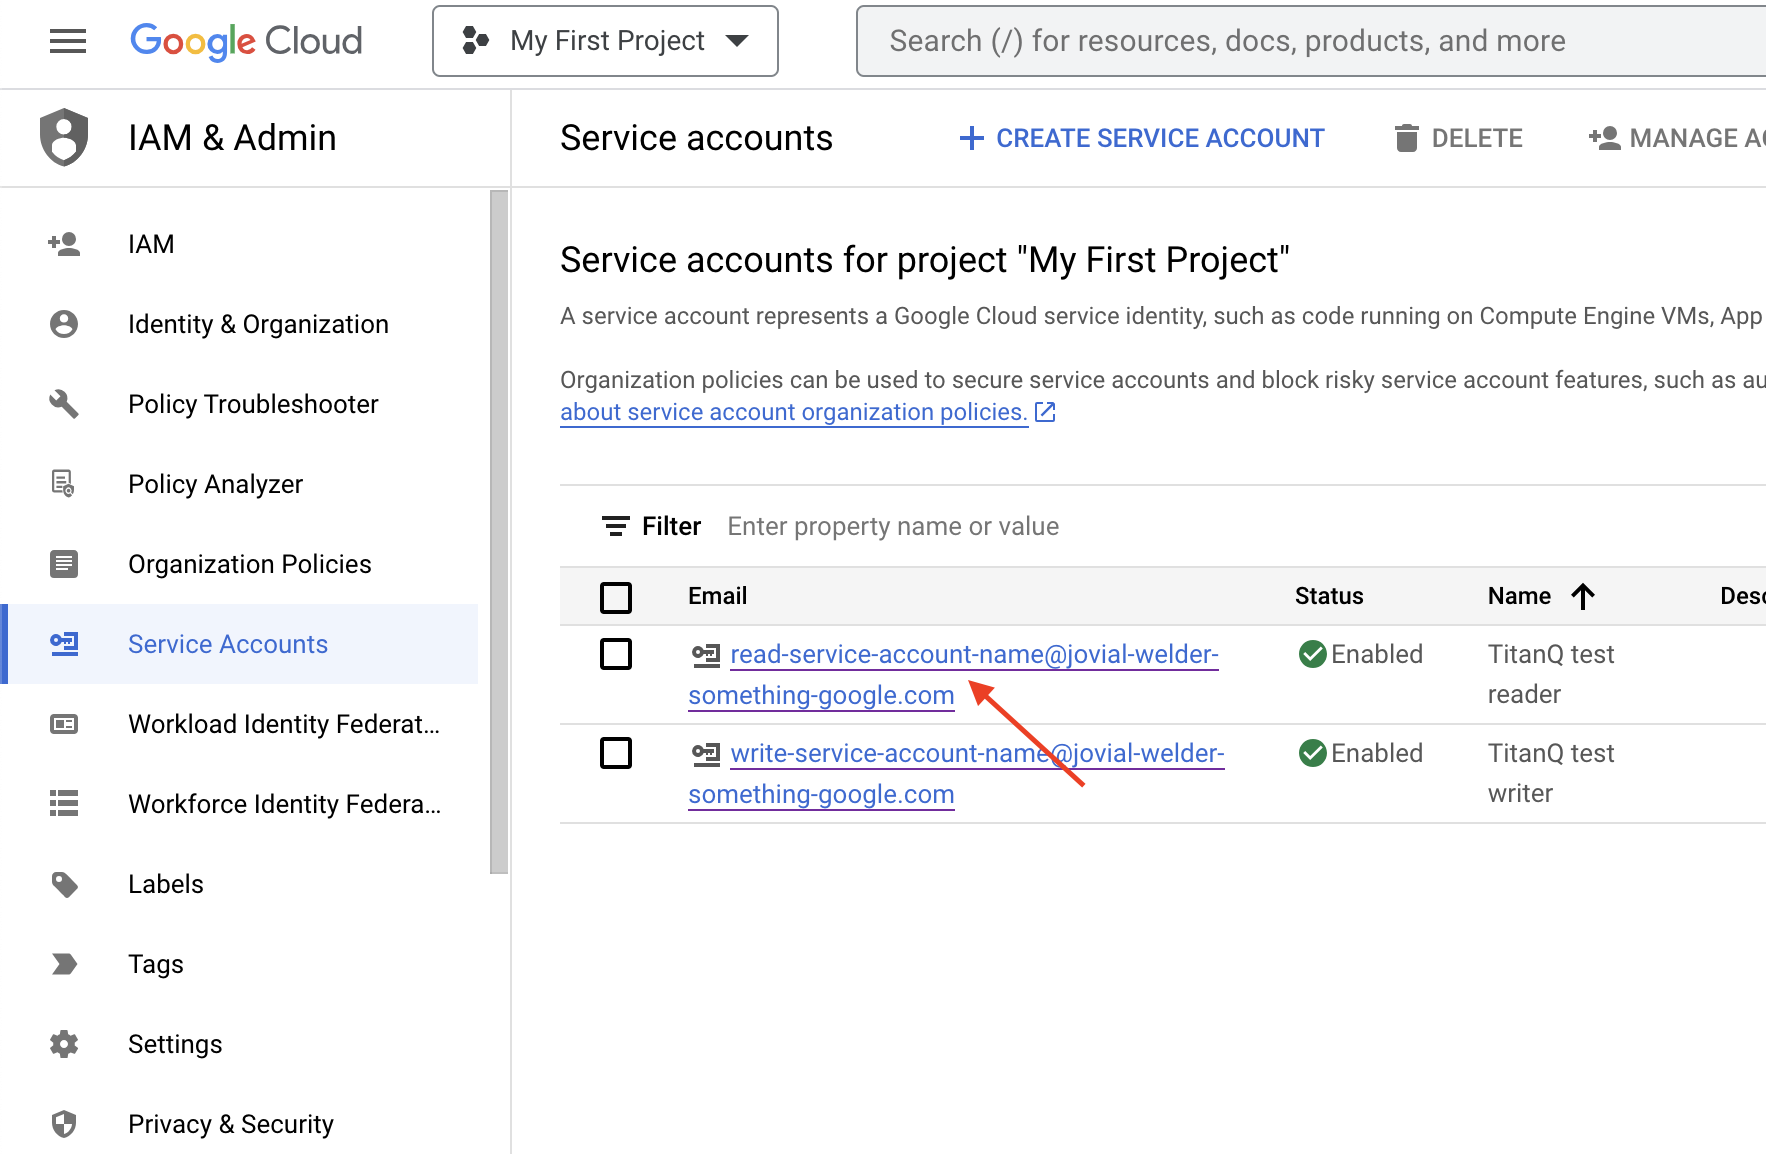
Back in the service accounts page, select the service account

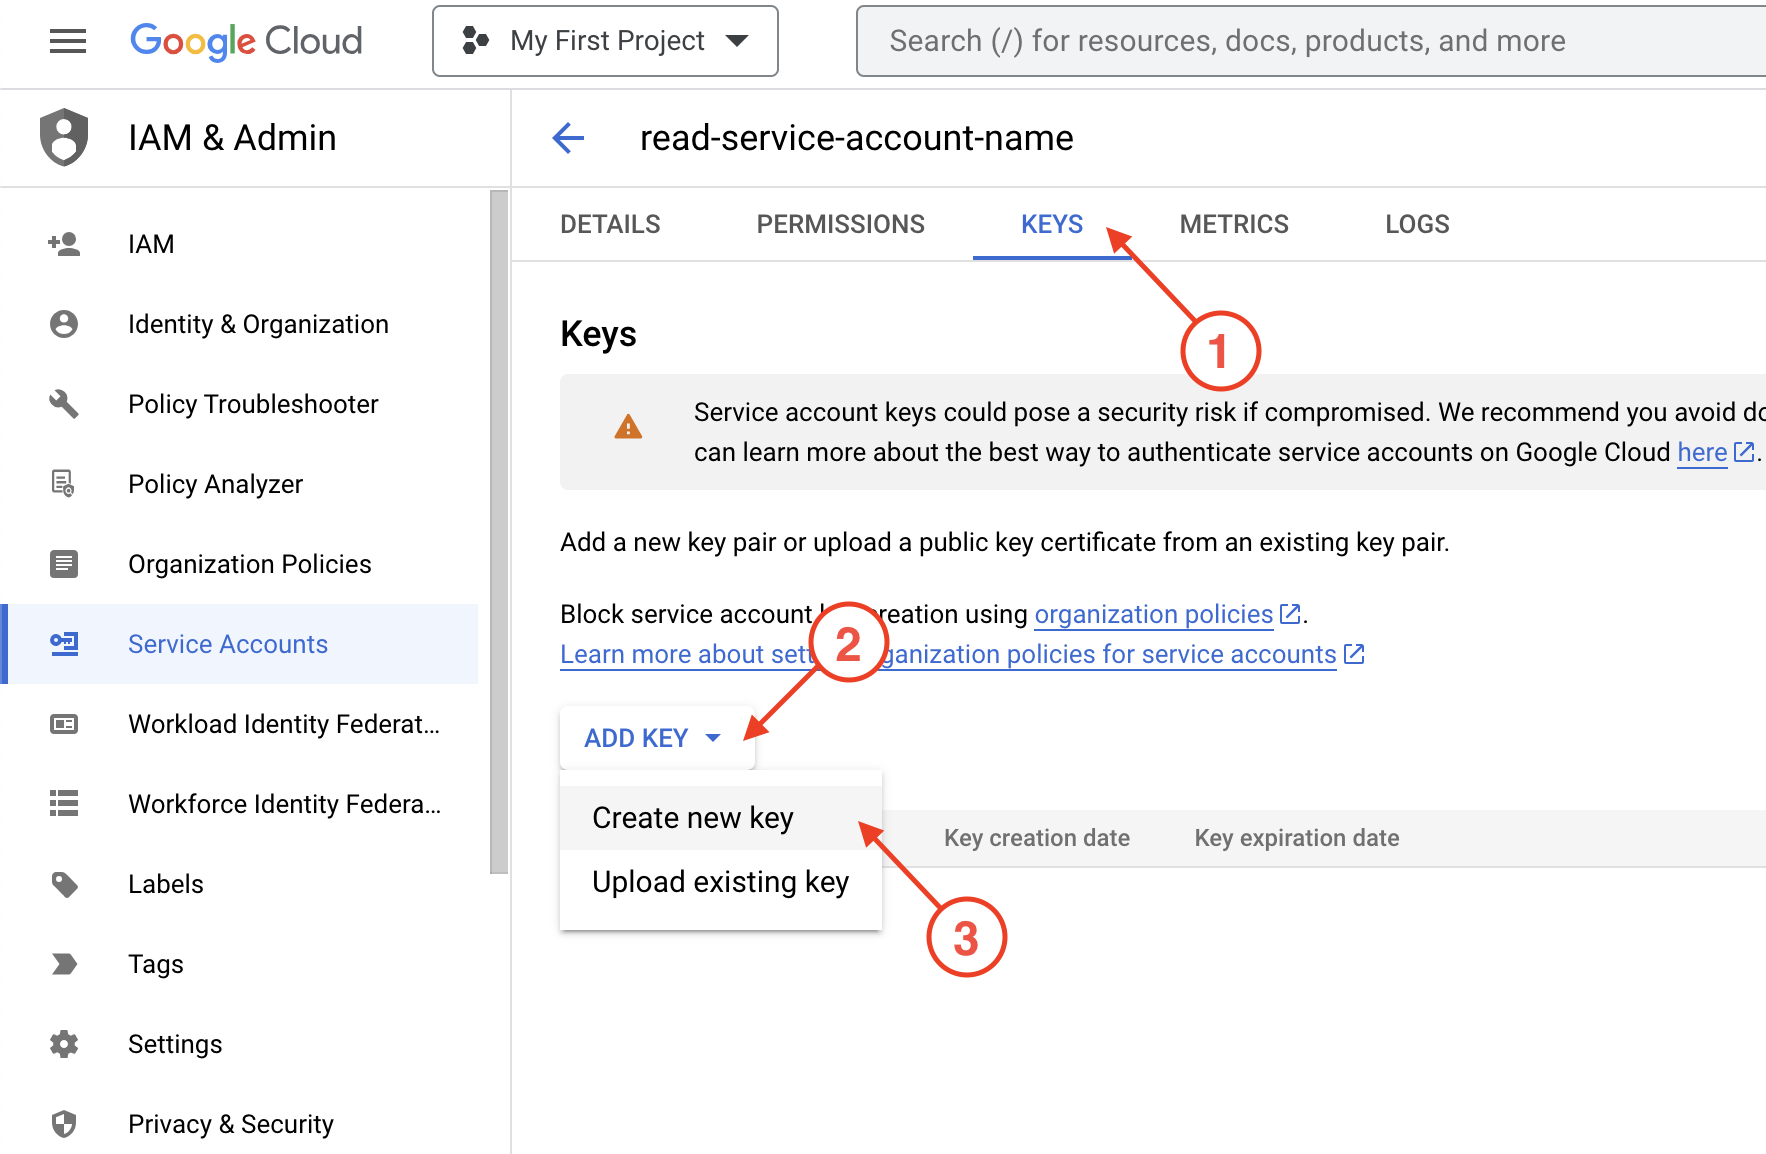
- Select KEYS tab
- Select ADD KEY
- Select Create new key

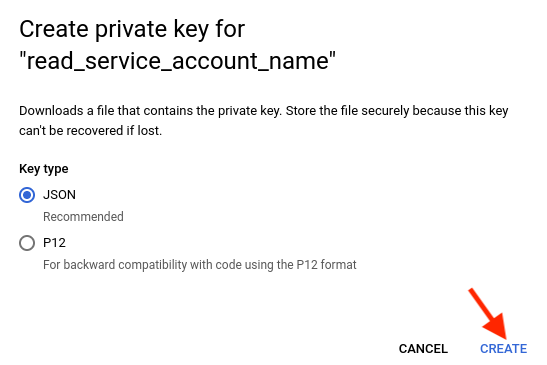
Leave the key type to JSON (default and recommended) and select CREATE. The browser will then download a .json file to your computer.

warning
This will be the one and only opportunity to download the .json file
If lost, you'll need to create a new key.
The key should be in the below format
{
  "type": "service_account",
  "project_id": "jovial-welder-id",
  "private_key_id": "some private key id",
  "private_key": "-----BEGIN PRIVATE KEY-----\n the private key \n-----END PRIVATE KEY-----\n",
  "client_email": "read-service-account-name@jovial-welder-something.com",
  "client_id": "a client id",
  "auth_uri": "https://accounts.google.com/o/oauth2/auth",
  "token_uri": "https://oauth2.googleapis.com/token",
  "auth_provider_x509_cert_url": "https://www.googleapis.com/oauth2/v1/certs",
  "client_x509_cert_url": "https://www.googleapis.com/robot/v1/metadata/x509/some_email",
  "universe_domain": "googleapis.com"
}
Write Key
Repeat the same steps to create a second key from the write-access-account-name instead
info
Keep these keys nearby and accessible for the next step