Creating Buckets
Creating Buckets
We will be creating two S3 buckets to interact with the TitanQ solver:
- a source bucket
- a destination bucket
All solver requests submitted to the TitanQ API will reference a pair of input files containing respectively a weights matrix and a bias vector. These two files will be stored in the source bucket, under your control.
When the request reaches the end of the queue and is submitted for solving, TitanQ will retrieve the two files.
Once the TitanQ solver finds a solution, the result vector and metrics file will be uploaded to your destination bucket.
| Bucket | Contents |
|---|---|
| source |
|
| destination |
|
Source bucket
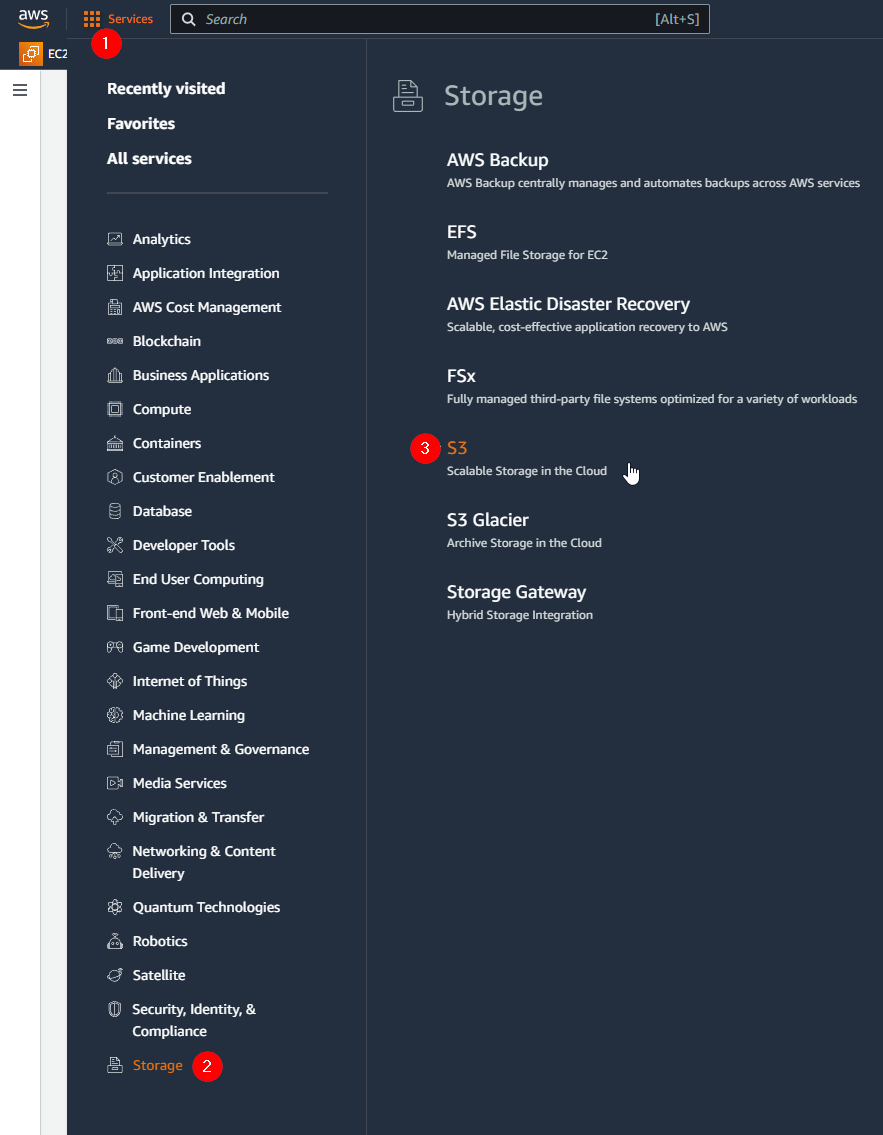
Start by going to the S3 management console:

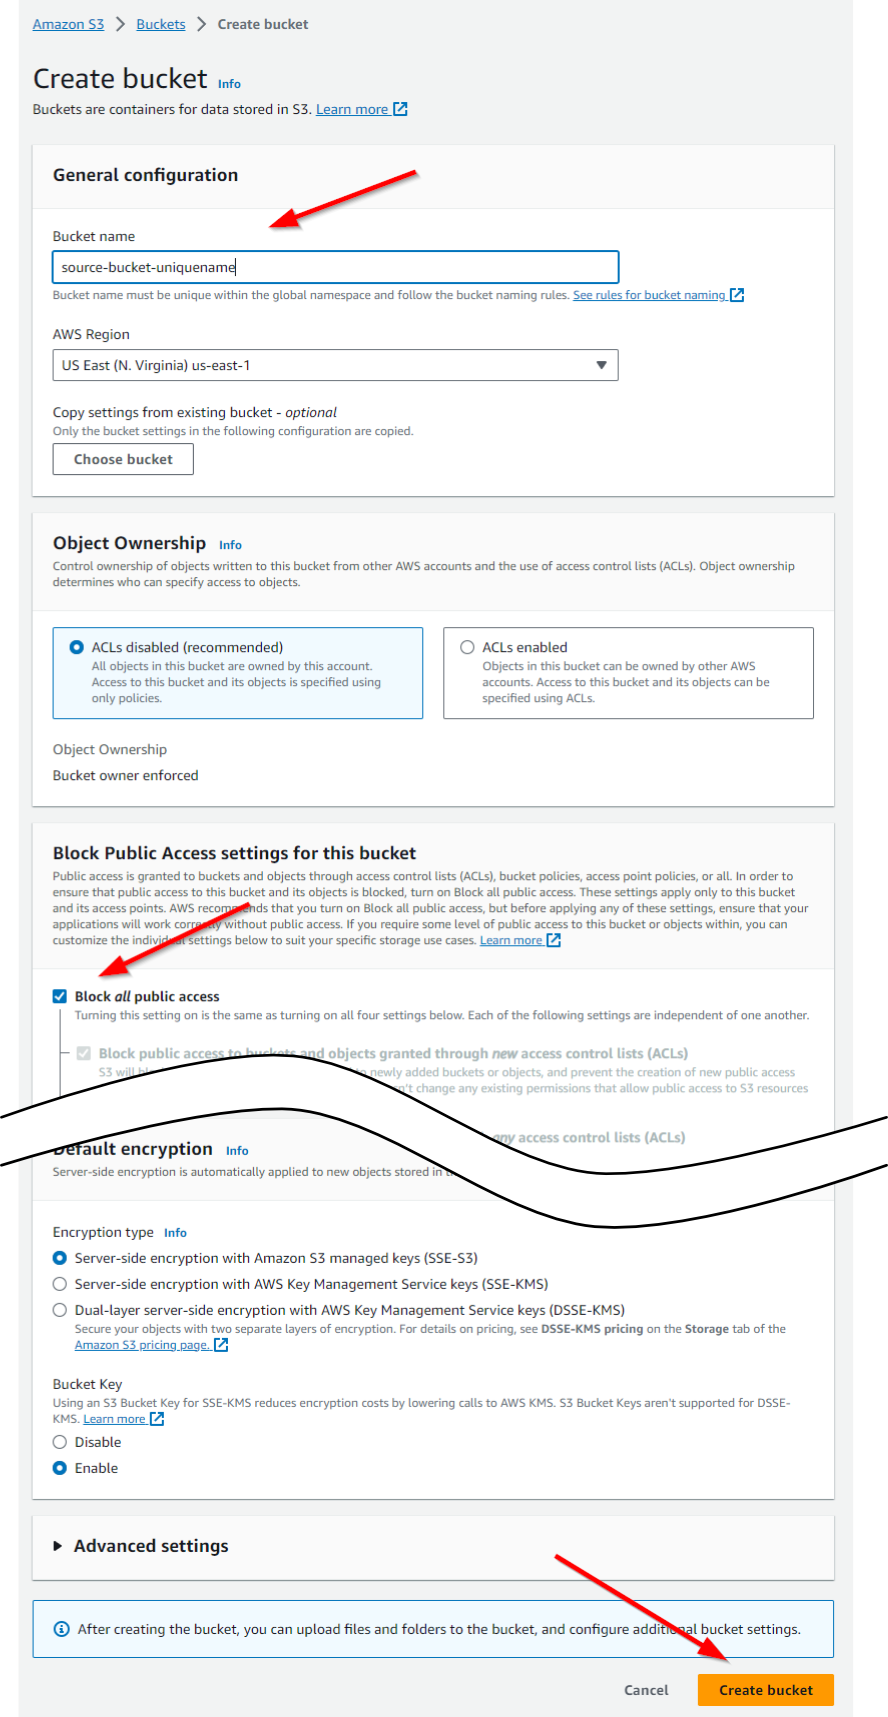
Select Create Bucket:

In the Create Bucket dialog
- Give the bucket a unique name (unique across all of AWS)
- For a source bucket, a good choice might be companyname-projectname-sourcebucket
- Ensure Block all public access is selected
- Select Create Bucket

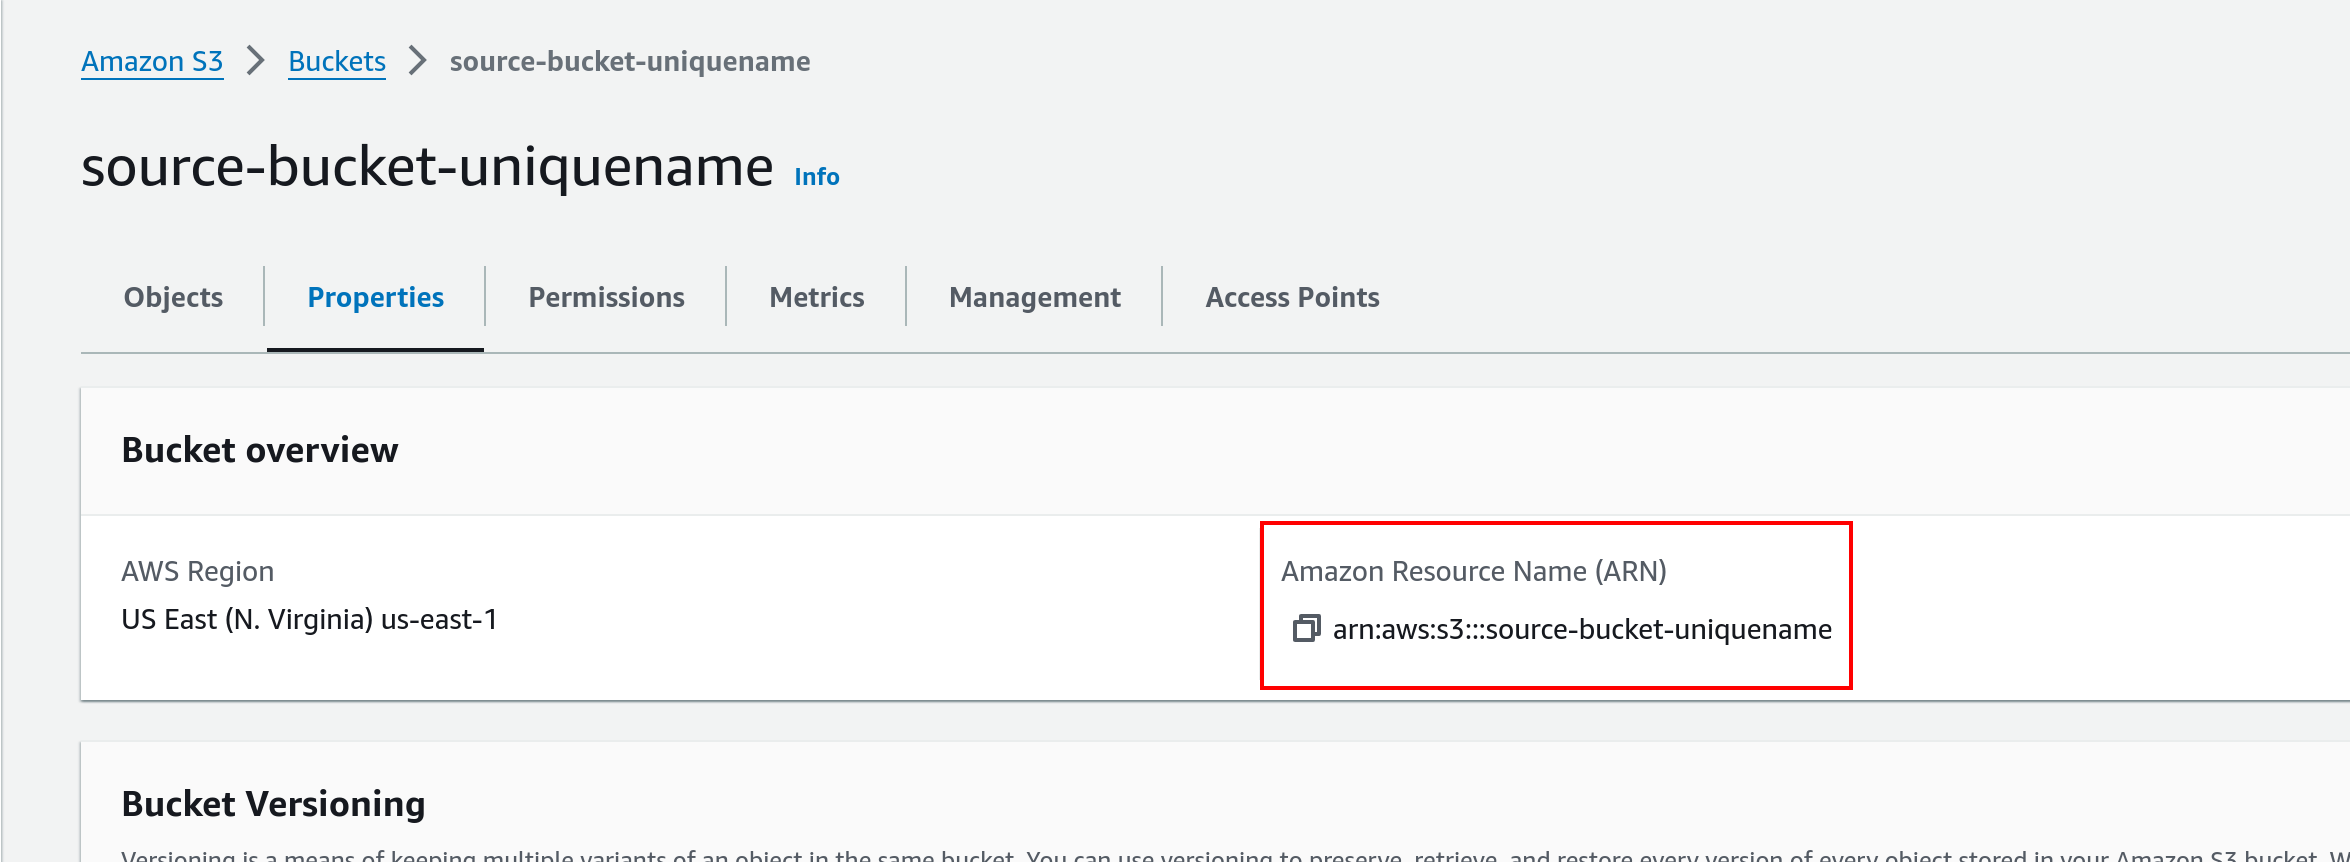
After the bucket is created, recover its ARN ("Amazon Resource Name"):
- In the S3 dashboard, click on the newly-created bucket
- Select the Properties tab
- Save the ARN for later use

Destination bucket
Repeat the same step to create a second bucket to serve as destination.